

Whether you realize it or not, every time you visit Mexico you’re required to have a Visitor’s Permit or a Visa. Most people get a Visitor’s Permit, which is the form you fill out on the plane. Included in your ticket price is the $25 fee for this permit, which is valid for 180 days.
Since we planned on staying in Mexico for longer than 180 days, we had to obtain a Visa. We applied for a Temporary Resident (Residente Temporal) visa, which would allow us to stay in Mexico for 1 year (renewal for up to 4 years) and allow us to import our car (a blog post on that at a later time). This Visa requires that we meet certain asset/income requirements: have monthly income equal to 300 days of the Mexican minimum wage or $30,804MX or savings/investments equal to 5,000 days worth of the minimum wage or $513,400MX. The deciding factor for us was that because we wanted to import our car, because we were bringing the cats with us. So we decided on the Temporary Resident Visa instead of the Permanent Resident Visa, which would not allow us to import our car.
This ended up being a 7-step process for us.
Step 1: Denver
We started in the Mexican Consulate in Denver. We knew that once we the Visa was issued, we would have to cross into Mexico within 6 months. Since we knew that we would be traveling for several months, and to allow for any unforeseen issues, we thought that getting the Visas in August would be good for our planned January entry to Mexico. I had read about other people merely walking into consulates to start the process. Therefore, about a week before I wanted to go to the consulate, I went to check on the consulate hours so we could get there first thing in the morning. To my complete surprise, I discovered the Mexican Consulate in Denver only processed Visa applications by appointment. To make matters worse, they only had 3 available slots in mid-September, very close to when we were planning to leave Denver. They weren’t together, but we grabbed them, signing up online and printing the forms we needed for our appointments.
Lexie and I had our appointments on the same day. It was a bit of a culture shock at the consulate, as everyone spoke Spanish and we didn’t (yet). We were shown some chairs to sit in and watched the very orderly process of Mexicans taking care of their business at multiple bank teller-like windows. A woman came out and took Lexie and me into a back room. She couldn’t find my appointment and subsequently taught me a very valuable lesson – I needed to include my full name on everything Mexican. That includes my middle name, Keefer, and my suffix, III. She took my financial verification data and sent us back out to pay our $36 Visa fees while she found my appointment and verified the info I had given her. Because I had given my full name on the online form, she needed to create a completely new appointment with the full information. This made the process take longer than it should have. She was extraordinarily nice, and fortunately spoke English. We got our mug-shot photos taken and signed some unknown forms, then called back into the office 20 or so minutes later and given back our passports, which now had the Visas in them.

Lisa went to the consulate 10 days later and came home with her Visa. (Note that different Consulates have different procedures and requirements than what we experienced in Denver. Check your local Consulate!)
Step 2: Border Crossing
The second step of our process came when we crossed the border into Mexico in January. We knew we couldn’t get the normal tourist permit, which would invalidate our Visa. Therefore, we very carefully showed our Visas and made sure that our immigration form was marked accurately, giving us 30 days to visit the Immigration office in Guadalajara.
 |
| Lexie filling out her paperwork |
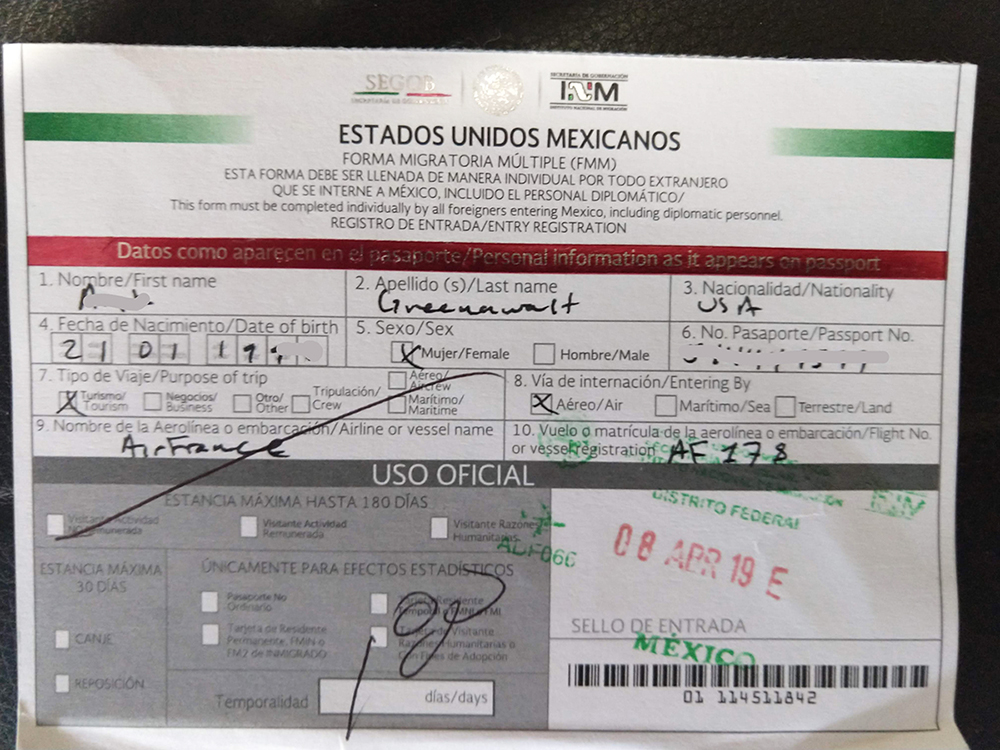 |
| This is the form we needed to have marked correctly |
Next … Part 2, The Mexican part!