
Due to the gas crisis that was occurring in Mexico when we
arrived, we were delayed in the city of Leon for a week before finally arriving
in Guadalajara. Then we wanted to jump right in to language school, so it was
almost 3 weeks before we finally made it into the immigration office in
Guadalajara.
arrived, we were delayed in the city of Leon for a week before finally arriving
in Guadalajara. Then we wanted to jump right in to language school, so it was
almost 3 weeks before we finally made it into the immigration office in
Guadalajara.
Step 3: Visit the
Immigration Office in Mexico
Immigration Office in Mexico
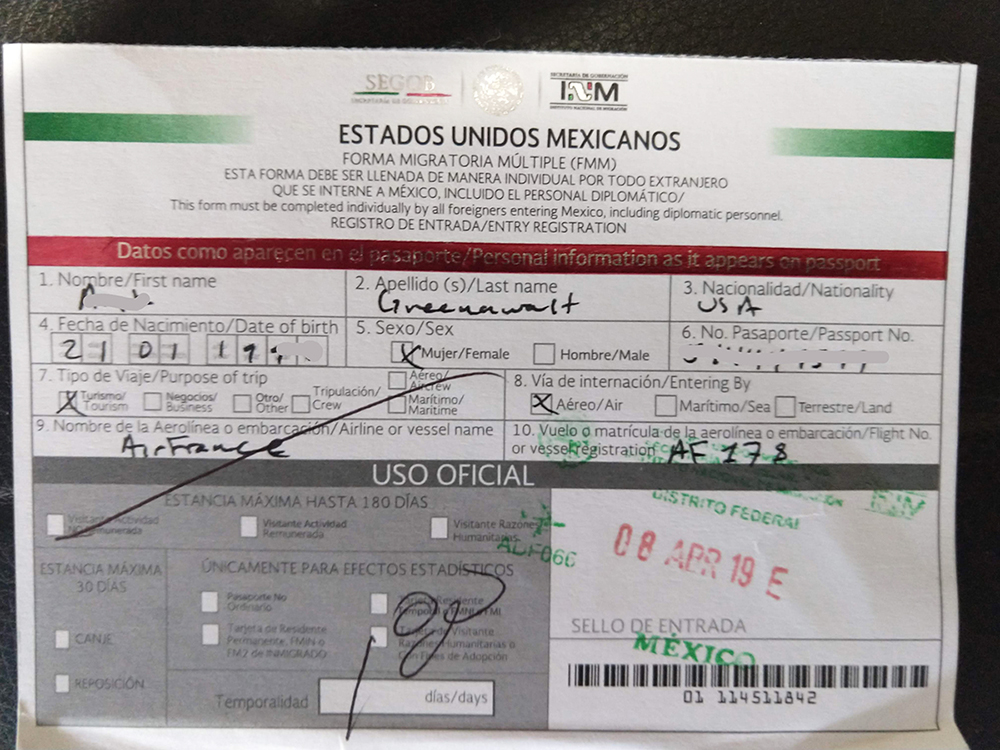
We found the Mexican Immigration page online, downloaded the
in-country immigration forms we needed, and filled them out. We dutifully made copies
of our passports and had more passport photos taken at a (rather pricey) photo
studio in Tlaquepaque. We then arrived at the Immigration office a few minutes
before it opened and showed the greeting staff the forms. They gave us a ticket
and showed us where to sit. We were quickly called up to a window and showed
the woman our paperwork (no English spoken there). She didn’t like my paperwork
since, as I had been warned at the Mexican Consulate in Denver, I needed to use
my full and complete name for everything. (Lisa, who had filled out the online forms,
had not been aware of this.) I was sent to a computer kiosk to refill it, not a
pleasant experience, as everything was in Spanish and a line was forming behind
me. Nonetheless, I was eventually successful. Lisa joined me in the line to
redo hers for another picky reason.
Back at the window, we were given another document that we
needed to immediately take to a bank, where we would pay approximately $200
each, obtain a receipt, and return to Immigration.
needed to immediately take to a bank, where we would pay approximately $200
each, obtain a receipt, and return to Immigration.
Step 4: Pay the Fee at
a Local Bank
a Local Bank
We walked a few blocks to find a bank, took a number, and sat
in the waiting area. Mexico is basically a cash society, so people go to banks
with cash to pay their bills – water, electric, cable, phone, and, in our case,
Immigration payments. There’s almost always people waiting in the chairs. When
our number was called, we went to the window and showed the form we were given.
The Immigration woman told us that the receipt we got from the bank had to have
our names EXACTLY as they were on our passports. The bank’s system wouldn’t
allow the hyphen in Lisa’s last name (Hamm-Greenawalt), so she is Lisa Hamm
Greenawalt in Mexico.
Step 5: Back to
Immigration
Immigration
Returning to the Immigration office, we waited until the
woman who had previously helped us was available, and gave her our receipt. She
took that, along with our copies and the Immigration permit we got at the
border, and told us that we would get an emailed approval in one or two weeks.
woman who had previously helped us was available, and gave her our receipt. She
took that, along with our copies and the Immigration permit we got at the
border, and told us that we would get an emailed approval in one or two weeks.

Lisa and Lexie got their emails in a week. We emailed it to
Lisa’s Mexican friend in Evergreen, Gabriela, to confirm that the dense
legalistic language in Spanish said we were approved. She said yes!
Lisa’s Mexican friend in Evergreen, Gabriela, to confirm that the dense
legalistic language in Spanish said we were approved. She said yes!
But mine didn’t arrive until a week later, causing a bit of anxiety.
We were each given an official Mexican identification number called a NUT, for
Numero Unico de Tramite.
We were each given an official Mexican identification number called a NUT, for
Numero Unico de Tramite.
But we weren’t finished.
Step 6: Photos and
Fingerprints
Fingerprints
We now had to go back to the Immigration office again to get
our fingerprints taken and give them photos, since they deemed that photos we
had submitted earlier in the process were slightly too big. So we got a new set
of photos taken (in the designated “infantil” size), and scheduled to take
another morning off from language school to finish the process.
our fingerprints taken and give them photos, since they deemed that photos we
had submitted earlier in the process were slightly too big. So we got a new set
of photos taken (in the designated “infantil” size), and scheduled to take
another morning off from language school to finish the process.
We again arrived at Immigration right before it opened, got
our tickets and were shown to a different set of seats. Lisa went to one window
and Lexie and I ended up going to another. They accepted Lisa’s photos and took
her fingerprints, giving her one small napkin to get the purple ink off her
fingertips. They also accepted Lexie’s photos, but not mine. They said the
white background, which looked pale gray, was too dark and I needed to get new
photos again.
First we went to the bathrooms to try to scrub the
fingerprint ink off our fingers! In the Men’s Room, a man sprayed my hands with
some solution and gave me paper towels, so I was fairly successful. Lisa and
Lexie didn’t get the same treatment in the Women’s Room so they had to work
harder, and Lexie’s fingerprints were purple for a day or two.

fingerprint ink off our fingers! In the Men’s Room, a man sprayed my hands with
some solution and gave me paper towels, so I was fairly successful. Lisa and
Lexie didn’t get the same treatment in the Women’s Room so they had to work
harder, and Lexie’s fingerprints were purple for a day or two.
Then we went in search of a nearby place to get photos taken,
found one a couple blocks away, and went back to the Immigration office with
the new pictures. Success!
found one a couple blocks away, and went back to the Immigration office with
the new pictures. Success!
Then they told us to
come back in a week for our Temporary Resident (Green) cards.
come back in a week for our Temporary Resident (Green) cards.
Step 7: Temporary
residents!
residents!
A week later we went back to the Immigration office a third
time. Once again, very efficiently, we got our numbers, got called to the final
issue and signed for our Green Cards.
time. Once again, very efficiently, we got our numbers, got called to the final
issue and signed for our Green Cards.
Finally, six months after the first visit to the Denver
Consulate and 6 weeks after we crossed the border, we held our Mexican Green
Cards in our hot little hands! We were officially Temporary Residents of
Mexico.


Consulate and 6 weeks after we crossed the border, we held our Mexican Green
Cards in our hot little hands! We were officially Temporary Residents of
Mexico.
 |
| Celebrating the success of the process and our new status as temporary Mexican residents! |